Monday, 19 August 2013

The final straight. Fireplaces and wardrobes .

It's been a while since I've posted. It's been a busy, busy few weeks. We're running a few weeks behind  so to help thing along I roped in a few friends to help with the easier jobs like painting. Thanks so much Stef , Kate and Asid. The whole bungalow has had the first coat of white paint . The entire lounge has had it's ceiling painted in a white sheen too.


Ceiling of the 3rd bedroom/study.


Moving on to what's been going on. The fireplace was installed today.


I contacted a local fireplace store called www.hertsfireplacegallery.co.uk a few months ago. They conducted a site survey free of charge and explained what fireplaces I could choose from to fit my chimney. They also recommended a chimney sweep to sweep the chimney. 


We had to build out the chimney breast. This was done in concrete block where the fireplace would go and plasterboard above. The area was recessed so I can fit a new TV.  With the TV being recessed heat shouldn't be a problem from the fireplace. The reason we had to do build out the chimney breast was because our hole for the fireplace wasn't central to the chimney breast. To keep the chimney breast from protruding too far the builders of the bungalow made a back to back chimney breast. This meant my chimney breast would extend into the neighbours lounge , on the left of the chimney breast and the neighbour's would come into my lounge on the right. The old fireplace was positioned central to the breast but the flue it self was actually located on the left .  A new one would have have to do dead centre to the hole which would mean it would go to the left of the chimney breast. 

I would have to build out the breast to centralise the fireplace. To keep costs down Neil at Herts Fireplace Gallery recommend I get my builder to build out the breast.


If you look above you can see the old breast which wasn't plastered at the time this picture was taken. The old breast won't be obvious as the wall has been made out for sound proofing.  I sent Neil photos of the build as we were making it and he was pleased with it all.

If you look above the fireplace a recess has been cut out for a in ceiling projector screen.


Neil sent one of his guys round today to fit the fireplace. It took just half a day to install. Finally the finished product. Very pleased. The heat doesn't come directly above so I am not worried about the TV at all. 


The pebbles glow a lovely red when the fire is on.


Really pleased with the end result. A big thank you to Neil at Herts Fire place gallery.

Upstairs I have had built in wardrobes installed. As we have lost the walk in wardrobe I had originally planned for due to lack of space we had to have wardrobes in the bedroom instead. I opted for built in to maximise the space.  I chose a local firm called Spacemaker. They came round conducted a site survey and over a cup of tea we negotiated a good price which wasn't far off Ikea prices.


For the interior I have had two rails behind each door apart from the central door which is full height rails for coats, it also has two shelves here too. I opted for white glass sliding doors.


For the other side of the door I opted for mirror doors. I have also had 2 rails put in here to maximise hanging space.

The quality of the wardrobe is second to none. The rails are reassuringly smooth and have a nice soft close mechanism. The carcass is over 30mm thick and feels very , very solid.

Will update throughout the week with the rest of the build.


Sunday, 4 August 2013

Security! British Gas safe and secure, soundproofing and updated pictures of the build.

So the final weeks are upon us! a lot is going on all at once so we can finish in time. This week I have taken delivery of a Home security system. I spent quite a bit of time researching the various options in the market for intruder alarms.

System requirements

1Wanted to be alerted when the alarm was triggered
2 Ability to monitor remotely and set alarm- helps in case I forget to set the alarm.
3 Ability to install additional  motion senors , door sensors etc

Wired or Wireless

Wired tends to be more reliable than wireless, however fitting a wired system is best to do when you're redecorating  , or renovating like I am so you can chase all the cables in the wall. Retro fitting a wired system can often be quite a messy task. Wireless technology has hugely improved over the years , and with improved battery performance I was leaning towards a wireless alarm.

A wireless systems were quoted cheaper due to the little amount of time it takes to install.

I contacted a few companies local to me but the quotes were coming in for around £1000- that was with me getting my builders to run any cables first too.

If I wanted to be alerted that the alarm had gone off I was looking at a around £25-30 a month in monitoring fees- this I thought was pretty expensive. Especially because the police would not be called straight away. Someone phoning me to tell me my alarm had gone is no more useful than a text or email.

I looked at ADT, Yale alarms , alarms on ebay etc.

The monthly fees ruled out ADT, Yale didn't have a remote app to set the alarm or check on it remotely. I didn't trust the quality of the alarms on ebay.

I discovered that British Gas have entered the home security alarm market with  , their alarm is called Safe and Secure.


This ticked all the boxes for.

1) Low monthly fee for Text alerts £8- ( If you don't want the text alerts you can save £8 a month)
2) iphone and android app to remotely monitor the alarm and activate / deactivate the alarm.
3) Easy to set up self install this is due to the fact it is also a wireless system
4) Not expensive

So what do you get?

For £199 you get the starter pack

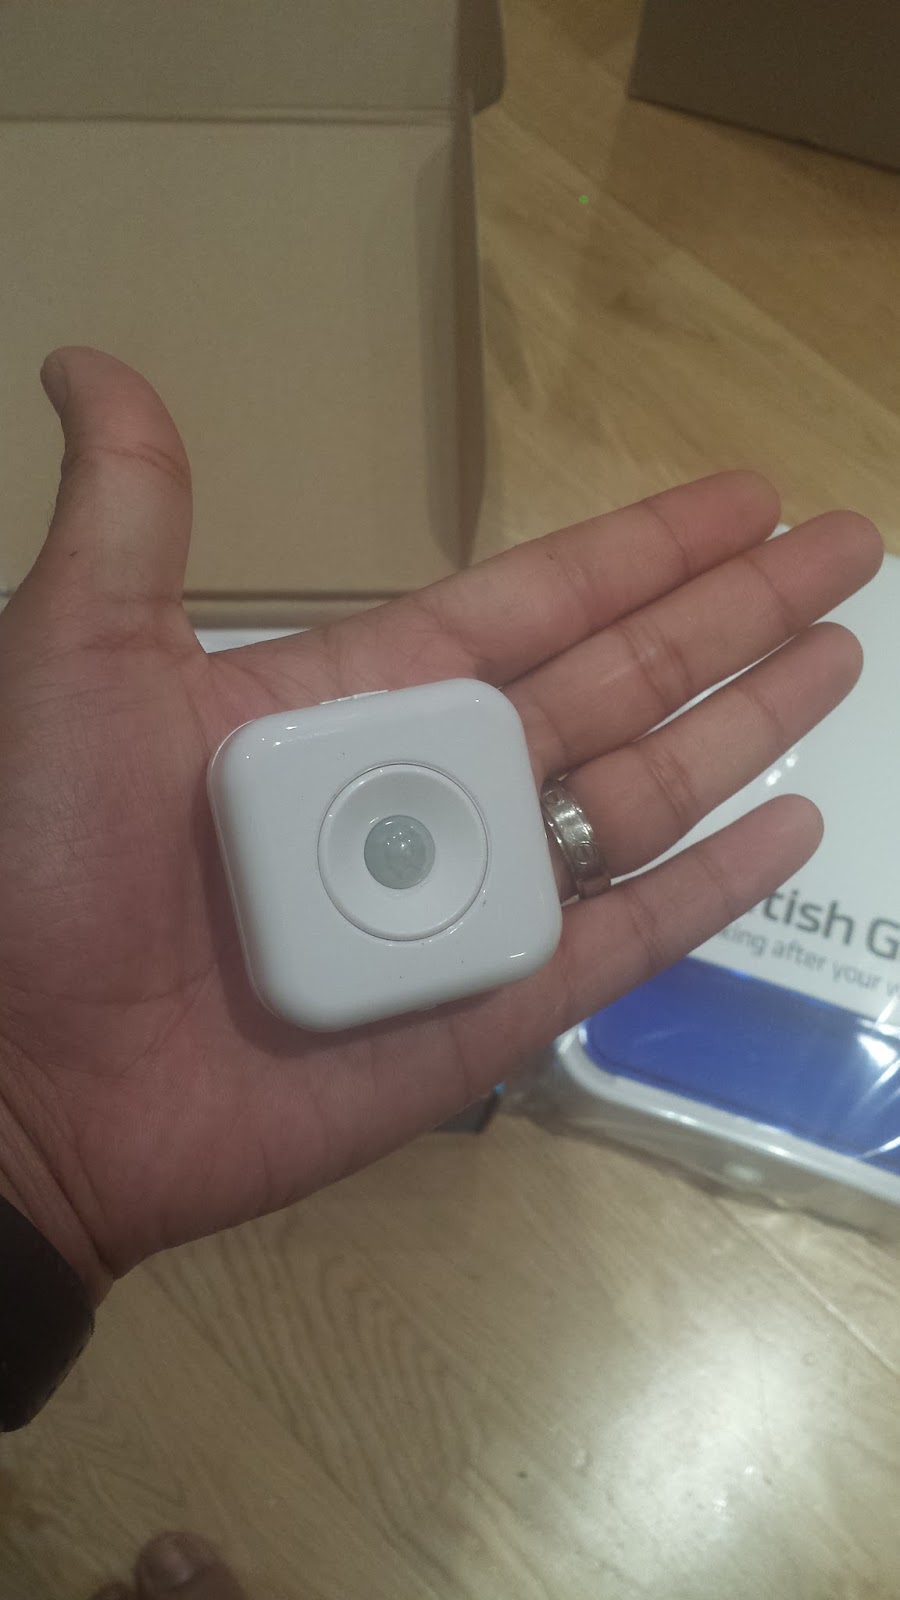
1 hub- this is connected to your router via a cat5 cable. This can be hidden anywhere
2 two motion sensors (these can be upgraded to pet friendly sensors free of charge)
3 2 remote fobs- to turn the alarm on and off, like a car remote . I preferred this over having a keypad on the wall of the hallway like most alarms.
4 Smart plug- you can plug a light/radio etc to into the smart plug and remotely turn it on and off from the app. Smart plug also acts as a signal booster for all the sensors and home plug.
5 - Decoy box- looks like an external siren but doesn't actually make a noise


Optional accessories

External siren
Internal siren- basically deafens intruders
Carbon Monoxide detector
Gas leak  detector
Water Leak detector
Smoke detector
control / panic button

I didn't want a fully monitored service with police response as I am having IP cameras installed inside and have bought CCTV outside which can be remotely monitored. If the alarm goes off, I can remotely see if the bungalow has been broken into via the cameras and call the police myself. The alarm can also email a second person so I can give a family member access to the CCTV and they can see if anyone has broken in too.

I am awaiting for the walls to be plastered and then will install the alarm and go into more details on the interface.

The side extension has finally been tiled - which is good timing with the torrential rain we have had.


Inside the downstairs has been plasterboarded through out. I have wired the cabling for the 5 speakers in the lounge and HDMI cables throughout the lounge.

I have also run the cabling for the lutron keypads and intercom system.

Downstairs lounge ceiling needs to be plasterboarded and then we're ready for skimming! On the home straight.


Below is the study/3rd bedroom which was hard to picture with my phone.


I wanted to soundproof the room. After installing the best part of 20 speakers in the house the last thing I wanted to do was not be able to use it properly. I wouldn't enjoy cranking up the system if I knew the sound was travelling next door and inconveniencing the neighbours.

We only have one wall we share with next door which is the lounge and front bedroom . The extension wall is independent as is the loft dormer wall. The front bedroom will have have a wardrobe along the party wall which will naturally act as a sound barrier.

The main lounge wall was my concern.

To build and effective sound barrier I had to construct a free standing wall, it would mean I would lose about 120mm of my room but as the room is 5 meters wide I didn't see that being a big problem.

I left a 1inch gap from the wall and then had the builders build the stud frame. The frame had to be completely independent from the front wall to make sure sound didn't travel into the wall. The stud frame was filled with acoustic insulation.


Acoustic plasterboard was laid on top of the stud. Green Glue will be then applied to another layer of plasterboard. and then screwed on top of the first layer of plasterboard. Green Glue is a noise proofing compound that is applied using a silicon gun


This should effectively stop sound going through the wall.

I have also bought Hoody speaker hoods for the ceiling speakers. Not only do they help with meeting the requirements of building regulation as they help prevent the spread of fire, but they also prevent noise leaking from the top of the ceiling speaker. This coupled with insulation in-between the ceiling joists and upstairs floor should hopefully help prevent noise leakage.

That's all for now!

Monday, 29 July 2013

We have stairs! plus floor joists and room for a Node Zero.

It's been a busy week. Building control were happy with the drain work. The damp proof course has been laid throughout and the whole extension has had the new joists laid to raise the floor level to the same height as the rest of the floorboards in the existing bungalow.  The dining area and kitchen area of the extension has had the floor beams raised slightly lower than the rest of the bungalow-28mm lower. This is because this area will have wet under floor heating and insulation panels will go here in which the pipes will be laid - bring it to the same level as the rest of the flooring in the bungalow. You can see the insulation panels in the below pic- they are in blue.


With so much space below the floor joists running services below here should be a breeze.

The stairs I am very pleased with the stairs as they take up a lot less room than I originally had thought they would. The stairs will be painted white once the building work is complete and I will have glass balustrades put in.


The roof light above the staircase does it's job very well and floods the stairs with light. Unfortunately the camera doesn't pick this up very well.


The post you see screwed on to the side of the staircase will be removed and was installed temporarily during the install.


The Node Zero will be placed below the first rung of stairs. A node zero is basically where a small server cabinet will be installed. This will house all the audio/video equipment for the house. I have already had BT install a telephone line here so the modem will go in here too.


The stud work has started to go up to make up the bathroom at the front of the house as well as for the study/3rd bedroom.


Finally the first fix for the lighting throughout the ground floor is in. It's full steam ahead as I have to move out of my current place in 3 weeks!

Sunday, 21 July 2013

Structural work all done!

Finally all the major structural work has been completed.The window that used to look out from the kitchen (now part of the lounge) to the side of the garden has been taken out. The lintel has been removed and  two RSJs have been installed above to make the opening bigger. The wall below the window has been removed. The opening is now just shy of six foot.


The pillar has  is now 90cm wide. The edge if the island will butt up to the pillar.

The existing door for the bedroom downstairs at the front of the bungalow is accessible from the lounge. Due to noise coming from the lounge etc I wanted to have the door moved to the side and make  it accessible from the hallway. A new opening has been made from the hallway into the bedroom at the front.


As there were two man holes in the area we have built over these have been sealed and new drainage pipes have been laid. A new man hole will be installed at the rear of the garden.


Upstairs the bedroom has been painted and the skirting and architrave has been fixed.


Outside the front entrance has had five steps built up.


Now that all the structural work has been completed. It should be full steam ahead for the inside. Floor joists will be installed and then the first fix for electrics and plumbing will go on. I am awaiting delivery of roof tiles which were out of stock. Once these arrive and installed the bungalow will be fully water tight.


Sunday, 14 July 2013

We have doors and a driveway!

Finally we have a front a door! Global door popped round and installed the door in a day. I chose a different handle to the one that comes standard with the door so this had to be ordered in from Germany and will be installed this week.

I am very pleased with the end result. From a few meters back you really cannot tell that it is composite and not wood. The frame feels extremely solid and the hinges and fittings feel and look of quality.

The frame is of the same colour as the door but the protective stickers have been left on until the building work is complete.


The bi folds have been installed too and really change the look of the back of the house. I had concerns that 6 meters of bi fold would have been very heavy and would make opening and closing them difficult. I am glad to say , being made of aluminium they are extremely light. From a locked position to fully open takes less than 45 seconds. As you can see from below , I have one traffic door that opens independently to the left and the other 5 open to the right.


The roof lantern also had the glass installed. A big thank you to Dave at CCS Midland, who whilst on holiday arranged for a replacement panel after one of the builders accidentally broke one. Very pleased with the roof lantern. The alternatives were dome lights which would have cost a lot more money and collectively would not have let as much light through. The lantern was £900 incl delivery.
I opted for a blue tint so the sky always looks blue and the glass supplied was also Pilkington self cleaning glass which is convenient! The lantern is 1..5meter by 2.5 meters.


The driveway concrete base has been laid. This will be left to fully cure and once all the major building has been completed I will arrange for the resin to be laid.


Finally inside the wall that separated the two bedrooms at the front of the bungalow has been removed to create one much larger bedroom.


The old sliding doors , kitchen door, and pillar in between have been removed. The old window from what used to be the bathroom has been removed and bricked up as the will divide the new study from the lounge. The old kitchen window has been removed and this wall will be taken down leaving behind just a pillar to make a larger kitchen area.


Sunday, 7 July 2013

Choosing a drive way- block, concrete, loose gravel, resin bonded gravel , resin bound gravel ? Plus update pictures

As well as deciding to do the rear patio , I have decided to do the drive way too. The bungalow slopes from the rear garden to the front and it would cheaper for me to excavate both the rear garden patio area and the front garden at once rather than doing them separately.

So after 3 days with a small JCB and 7 grab lorries full of soil I now have the patio area which will be covered in indian stand stone. The retaining walls have been constructed from concrete block which will be rendered and then painted white.


The patio will be 6 inches higher than the ground you see in the picture above  once the base has been prepared with hardcore and bedding sand.


I have two cars and with the bungalow being on a small close I want to keep them off the streets. So want to get the drive made asap.

Planning permission for Driveways?

Half of my existing front garden already had a driveway. However as  I am converting the rest of the driveway I would have needed planning permission if I wasn't installing a soakaway. A soakaway basically is a crate that is buried 1 meter underground to which drainage along the driveway diverts rain water into it rather than into the road. This negates the need for planning permission.


I looked into various finishes for the drive way and have settled on Resin Bound Gravel.

Block Paving- the most common finish for driveways, but  in my opinion doesn't look very nice after a few years , needs weeding often .

Loose Gravel- Love the look of it, however the loose gravel makes it's way on the road which can be hazardous for pedestrians , also with my drive being on a slope the gravel will need regular spreading to keep an even finish. Pros : very cheap.

Concrete- looks awful. Pros : very cheap

Tarmac- same as above

Resin bonded gravel - is basically a layer of glue applied to a solid base like concrete , upon which gravel is poured. Loose gravel is brushed off so you're left with a thin layer of gravel stuck to the top. Pros :Gives you the look of gravel but you don't have loose gravel problems. Cons: The gravel does come loose with heavy traffic of cars.

Resin Bound Gravel- We have a winner! Basically gravel and a resin and mixed together in a mixer. This is then laid on top of a concrete base. This gives you the looks of gravel however much stronger than Resin bonded gravel as the entire piece of gravel is covered in resin and forms a strong bond rather than just one side like in Resin bonded gravel. I will post pictures once it has been laid but this will be the last job after all the skips and heavy machinery have been removed. Resin Bound is completely SUDs  compliant as the gravel forms natural pockets for rain water to travel down, to the base below and then to the drainage channel at the bottom of the drive and eventually into the soakaway.

The base for the gravel to be laid upon will be 6inches thick of concrete with a metal mesh for added strength.

Before :


After : 60 tonnes of soil have been removed


The front garden will have retaining walls built along the sides and rear leaving an area of 7.2m by 7.2m for a driveway. I will leave a small flower bed along the sides and rear.


Finally the rest of the roof has been constructed but is yet to have tiles laid . This will be done this week. Finally the 6 meter bi fold doors are going in tomorrow and the front door on Wednesday.